本文发表在《搜狐技术产品》公众号如何让iOS推送播放语音
iOS 推送播放语音 一:背景 iOS 推送播放语音的需求调研,即收到推送后,播放推送的文案,文案的内容不固定。类似于支付宝和微信的收款到账语音。
二:开发过程 a. Notification Service Extension
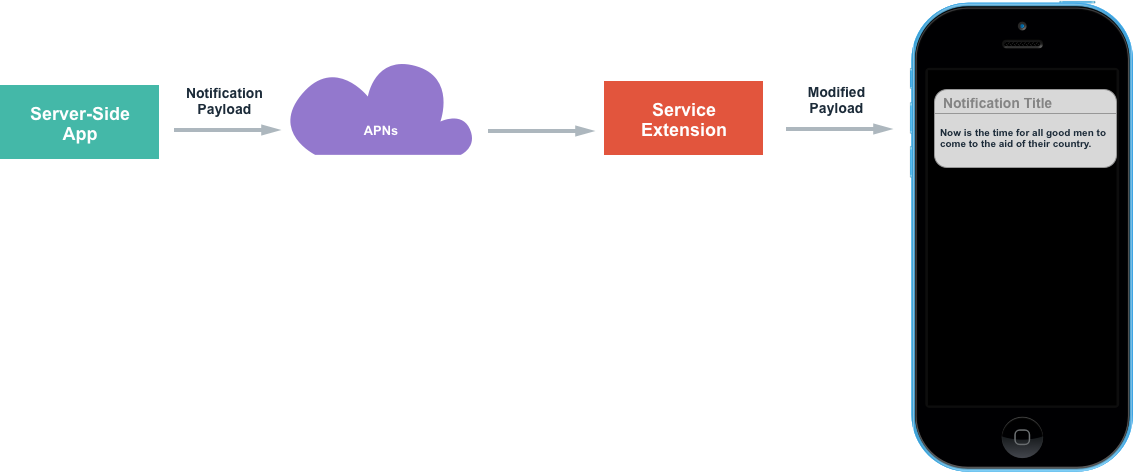
项目添加了Notification Service Extension之后的逻辑,和没添加之前有所不同。如下图:
通知栏的生命周期:
从通知叮一下展示(触发代码:self.contentHandler(self.bestAttemptContent);)出来到通知被收起(系统控制),大概有6秒左右的时间。
如果收到通知后,没有呼出通知栏,最多30s系统会调用serviceExtensionTimeWillExpire方法中的self.contentHandler(self.bestAttemptContent)来呼出通知栏。
要注意的是,Notification Service Extension和主项目不是同一个Target,所以主项目的文件和这个Target文件是不共享的。
创建新文件的时候要注意勾选要添加到的Target
比如添加推送播放语音的类,需要勾选到Notification Service Extension Target下;
拷贝播放语音的第三方SDK,需要勾选到Notification Service Extension Target下;
在第三方平台创建新应用时,要填写的bundleID也应该是Notification Service Extension Target对应的bundleID。 ,这点尤其要注意,因为百度的测试账号离线SDK的添加只能添加一次,错了的话,就要用新的账号再去注册,血泪的教训,😂。
bundle目录的访问也不是同一个,可以通过App Group共享数据。
打开后台播放时,其实也应该是Notification Service Extension Target下的后台播放,这个后面详细说明。
创建步骤如下:
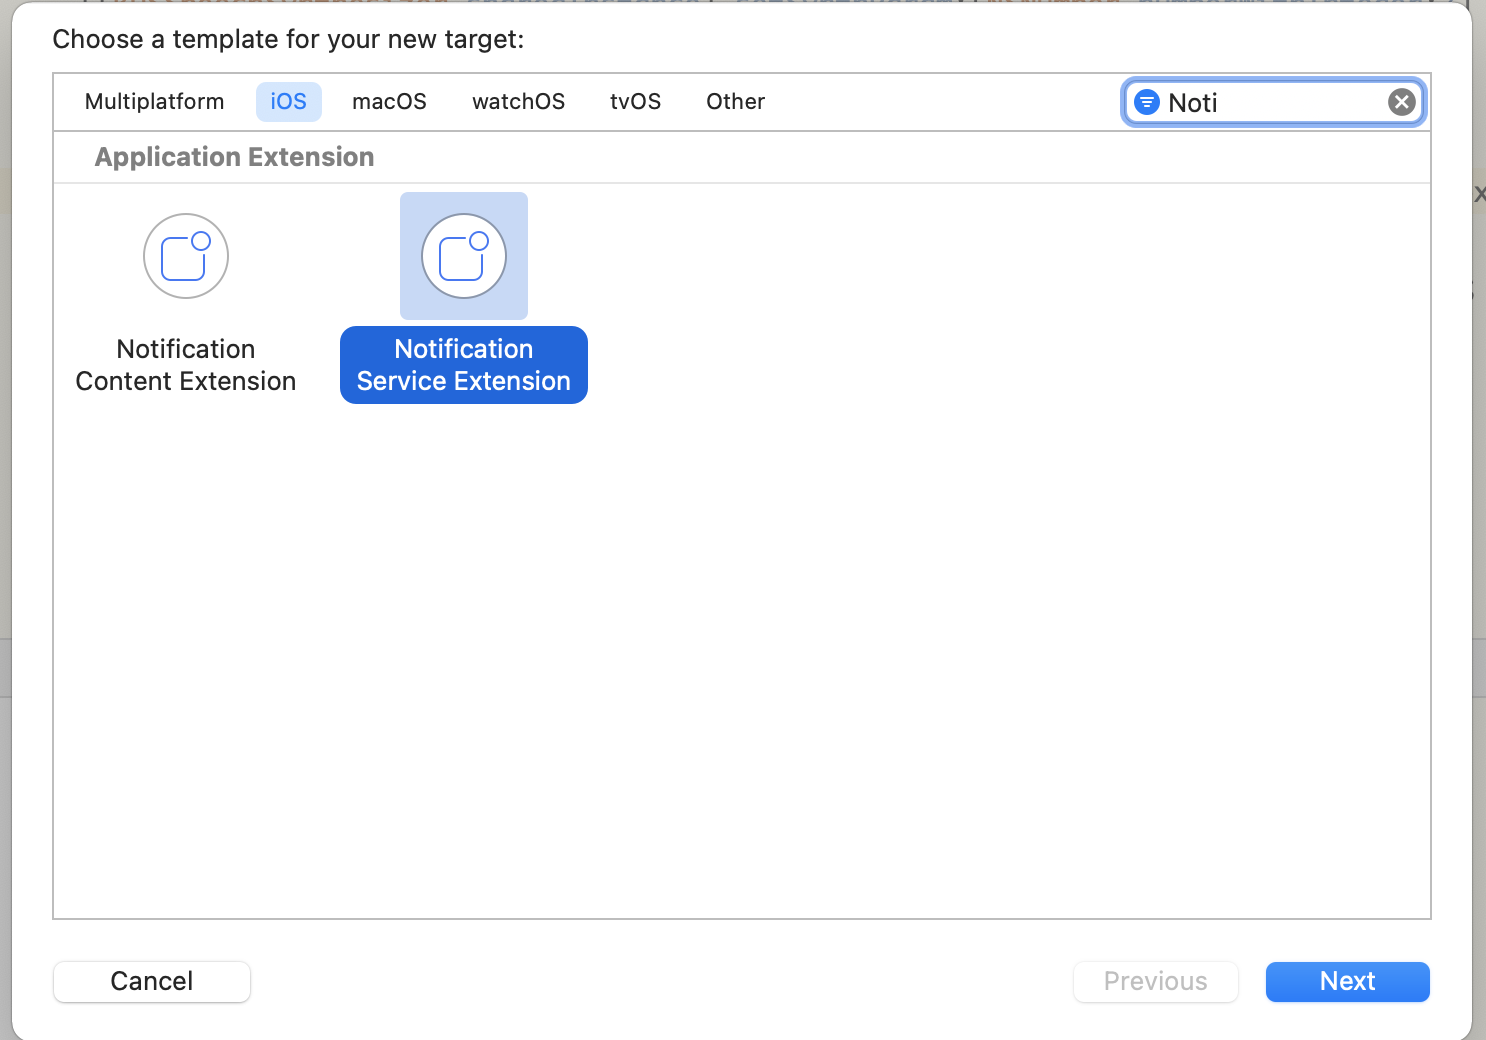
创建Notificaiton Service Extension Target,选中Xcode项目,点击File -> New -> Target,选中Notification Service Extension Target。有两个很相似的,注意选对,如下图:
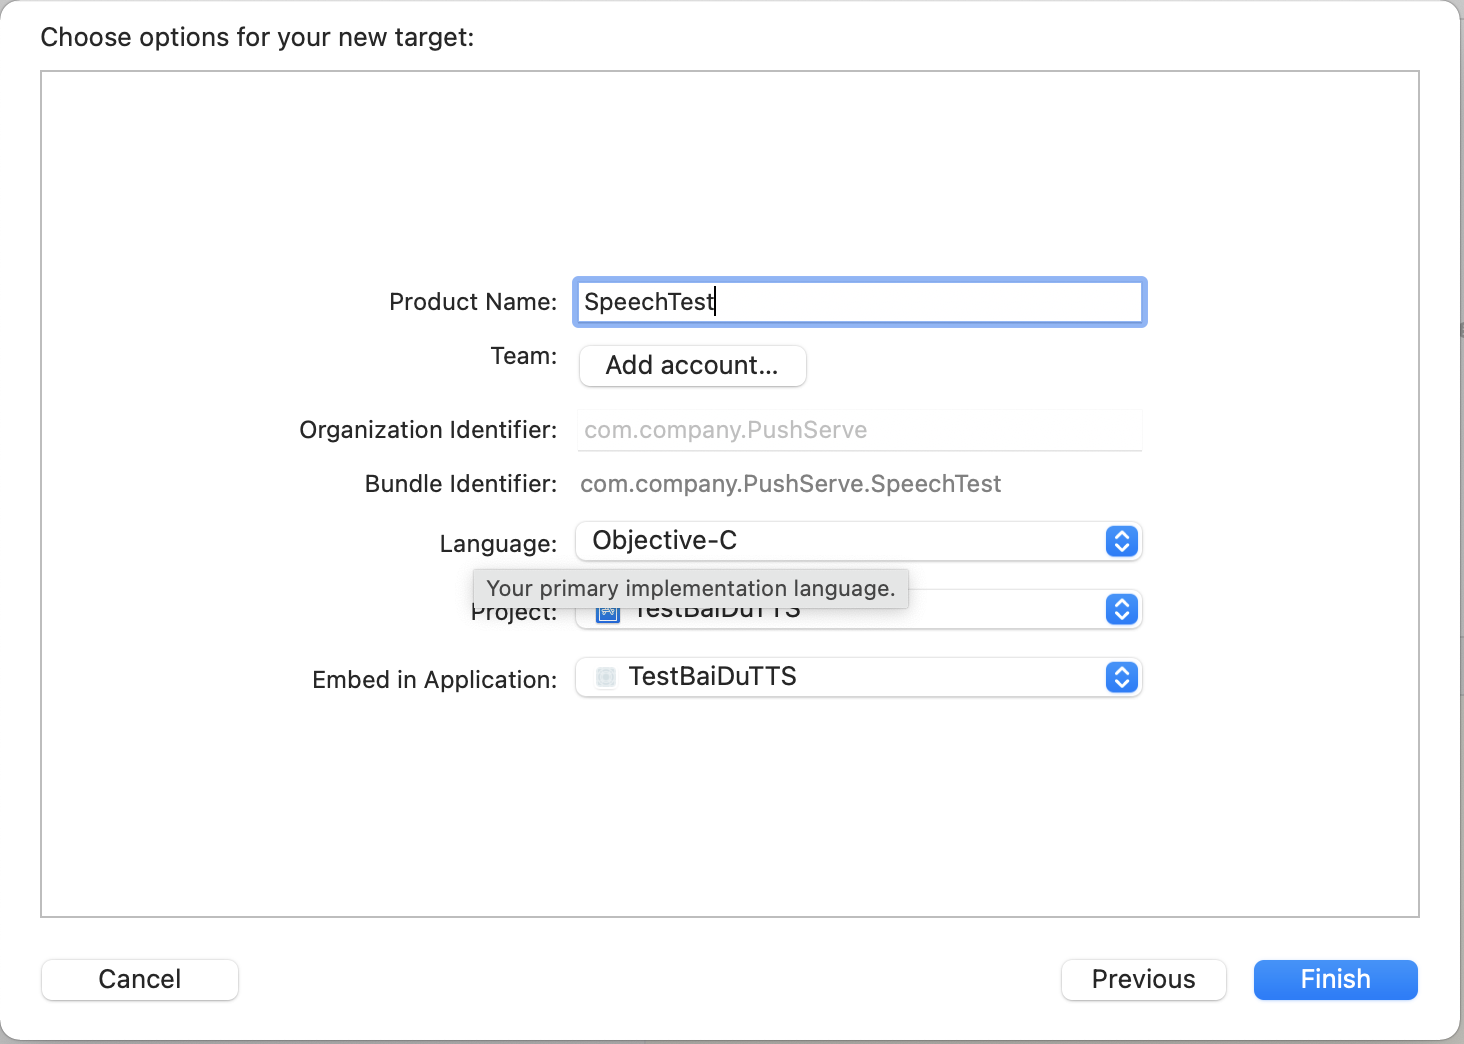
点击Next,输入Product Name
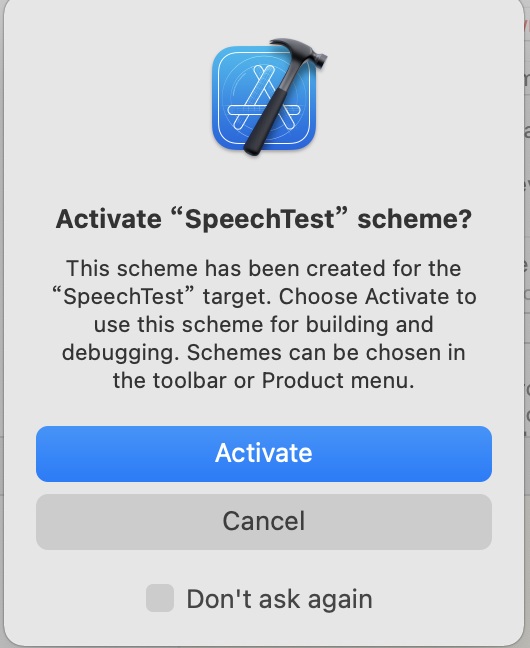
点击完成,点击Activate
打开NotificationService.m中的文件,这个类就是Notificaiton Service Extension添加后自动创建的类,添加了之后,接受到推送的处理都可以在这个位置修改
didReceiveNotificationRequest:withContentHandler:方法,其中的bestAttemptContent中的userInfo即包含了推送的详细信息。如果想要修改展示的标题和内容或者推送的语音,都在这个方法最后回掉前操作,
其中修改推送铃声时要注意:
多条推送处理的问题,在didReceiveNotificationRequest:withContentHandler:方法中调用self.contentHandler(self.bestAttemptContent);,即会展示对应的通知,如果不调用此方法,最多30s系统会自动调用此方法,假设一次性来了10条通知,会发现,通知并没有弹出10次 ,也没有按顺序一次次展示,所以多条推送如果没有处理,播放语音时就会出现问题。
在系统播放类AVSpeechSynthesizer的代理方法中,有播放完成的回掉speechSynthesizer:didFinishSpeechUtterance:,把呼出通知栏的代码self.contentHandler(self.bestAttemptContent)从didReceiveNotificationRequest:withContentHandler:方法中,移到播放完成的回掉方法中调用,即可保证语音按顺序一条条展示。(或者添加到数组或着OperationQueue中,播放完成继续下一条)
1
2
3
4
5
6
7
8
9
10
11
12
13
14
15
16
17
18
19
20
21
22
23
24
25
26
27
28
29
30
31
32
33
34
35
36
37
38
39
40
41
42
43
44
45
46
47
48
49
50
51
52
53
54
55
56
57
58
59
60
61
62
63
64
65
66
67
68
@interface NotificationService () @property (nonatomic, strong) void (^contentHandler)(UNNotificationContent *contentToDeliver); @property (nonatomic, strong) UNMutableNotificationContent *bestAttemptContent; @end @implementation NotificationService - (void)didReceiveNotificationRequest:(UNNotificationRequest *)request withContentHandler:(void (^)(UNNotificationContent * _Nonnull))contentHandler { self.contentHandler = contentHandler; self.bestAttemptContent = [request.content mutableCopy]; // Modify the notification content here... // 修改推送的标题 // self.bestAttemptContent.title = [NSString stringWithFormat:@"%@ [modified]", self.bestAttemptContent.title]; // 修改推送的声音,自定义铃声支持的声音格式包括,aiff、wav以及wav格式,铃声的长度必须小于30s,否则系统会播放默认的铃声。 // self.bestAttemptContent.sound = [UNNotificationSound soundNamed:@"a.wav"]; // 播放处理 [self playVoiceWithInfo:self.bestAttemptContent.userInfo]; self.contentHandler(self.bestAttemptContent); } - (void)serviceExtensionTimeWillExpire { // Called just before the extension will be terminated by the system. // Use this as an opportunity to deliver your "best attempt" at modified content, otherwise the original push payload will be used. self.contentHandler(self.bestAttemptContent); } - (void)playVoiceWithInfo:(NSDictionary *)userInfo { NSLog(@"NotificationExtension content : %@",userInfo); NSString *title = userInfo[@"aps"][@"alert"][@"title"]; NSString *subTitle = userInfo[@"aps"][@"alert"][@"subtitle"]; NSString *subMessage = userInfo[@"aps"][@"alert"][@"body"]; NSString *isRead = userInfo[@"isRead"]; NSString *isUseBaiDu = userInfo[@"isBaiDu"]; [[AVAudioSession sharedInstance] setCategory:AVAudioSessionCategoryPlayback withOptions:AVAudioSessionCategoryOptionDuckOthers error:nil]; [[AVAudioSession sharedInstance] setActive:YES withOptions:AVAudioSessionSetActiveOptionNotifyOthersOnDeactivation error:nil]; // Ps: 下面代码示例并没有多条播放的处理,还请注意 if ([isRead isEqual:@"1"]) { // 播放语音 if ([isUseBaiDu isEqual:@"1"]) { // 使用百度离线语音播放 [[BaiDuTtsUtils shared] playBaiDuTTSVoiceWithContent:title]; } else { // 使用系统语音播放 [[AppleTtsUtils shared] playAppleTTSVoiceWithContent:title]; } } else { // 无需播放语音 } } @end
其中AppleTtsUtils中实现如下,大致就是使用AVSpeechSynthesizer直接播放,设置音量和语速,需要注意的是,
音量的设置
数字的处理
数字转语音,采用zh-CN的voice后,数字的播放方式是几万几千几百几十几这种,可采用数字后面拼接空格的方式来处理;遍历内容的每一个字符串,如果是数字,则拼接一个空格到后面,最后播放时数字就会一个个读出来。
1
2
3
4
5
6
7
8
9
10
11
12
13
14
15
16
17
18
19
20
21
22
23
24
25
26
27
28
29
30
31
32
33
34
35
36
37
38
39
40
41
42
43
44
45
46
47
48
49
50
51
52
53
54
55
56
57
58
59
60
61
62
63
64
65
66
67
68
69
70
71
72
73
74
75
76
77
78
79
80
81
82
83
84
85
86
87
88
89
90
91
92
93
94
95
96
97
#import "AppleTtsUtils.h" #import <AVFoundation/AVFoundation.h> #import <AVKit/AVKit.h> @interface AppleTtsUtils ()<AVSpeechSynthesizerDelegate> @property (nonatomic, strong) AVSpeechSynthesizer *speechSynthesizer; @property (nonatomic, strong) AVSpeechSynthesisVoice *speechSynthesisVoice; @end @implementation AppleTtsUtils + (instancetype)shared { static id instance = nil; static dispatch_once_t onceToken; dispatch_once(&onceToken, ^{ instance = [[self class] new]; }); return instance; } - (BOOL)isNumber:(NSString *)str { if (str.length == 0) { return NO; } NSString *regex = @"[0-9]*"; NSPredicate *pred = [NSPredicate predicateWithFormat:@"SELF MATCHES %@",regex]; if ([pred evaluateWithObject:str]) { return YES; } return NO; } - (void)playAppleTtsVoiceWithContent:(NSString *)content { if ((content == nil) || (content.length <= 0)) { return; } // 数字转语音,采用zh-CN的voice后,数字的播放方式是几万几千几百几十几这种,故而采用数字后面拼接空格的方式来处理;遍历内容的每一个字符串,如果是数字,则拼接一个空格到后面,最后播放时数字就会一个个读出来。 NSString *newResult = @""; for (int i = 0; i < content.length; i++) { NSString *tempStr = [content substringWithRange:NSMakeRange(i, 1)]; newResult = [newResult stringByAppendingString:tempStr]; if ([self deptNumInputShouldNumber:tempStr] ) { newResult = [newResult stringByAppendingString:@" "]; } } // Todo: 英文转语音 AVSpeechUtterance *utterance = [AVSpeechUtterance speechUtteranceWithString:newResult]; utterance.rate = AVSpeechUtteranceDefaultSpeechRate; utterance.voice = self.speechSynthesisVoice; utterance.volume = 1.0; utterance.rate = AVSpeechUtteranceDefaultSpeechRate; [self.speechSynthesizer speakUtterance:utterance]; } - (AVSpeechSynthesizer *)speechSynthesizer { if (!_speechSynthesizer) { _speechSynthesizer = [[AVSpeechSynthesizer alloc] init]; _speechSynthesizer.delegate = self; } return _speechSynthesizer; } - (AVSpeechSynthesisVoice *)speechSynthesisVoice { if (!_speechSynthesisVoice) { _speechSynthesisVoice = [AVSpeechSynthesisVoice voiceWithLanguage:@"zh-CN"]; } return _speechSynthesisVoice; } - (void)speechSynthesizer:(AVSpeechSynthesizer *)synthesizer didStartSpeechUtterance:(AVSpeechUtterance *)utterance { NSLog(@"didStartSpeechUtterance"); } - (void)speechSynthesizer:(AVSpeechSynthesizer *)synthesizer didCancelSpeechUtterance:(AVSpeechUtterance *)utterance { NSLog(@"didCancelSpeechUtterance"); } - (void)speechSynthesizer:(AVSpeechSynthesizer *)synthesizer didPauseSpeechUtterance:(AVSpeechUtterance *)utterance { NSLog(@"didPauseSpeechUtterance"); } - (void)speechSynthesizer:(AVSpeechSynthesizer *)synthesizer didFinishSpeechUtterance:(AVSpeechUtterance *)utterance { NSLog(@"didFinishSpeechUtterance"); [self.speechSynthesizer stopSpeakingAtBoundary:AVSpeechBoundaryWord]; // // 每一条语音播放完成后,我们调用此代码,用来呼出通知栏 // 可通过Block回掉暴露给上层 // self.contentHandler(self.bestAttemptContent); }
b. 百度TTS离线SDK添加
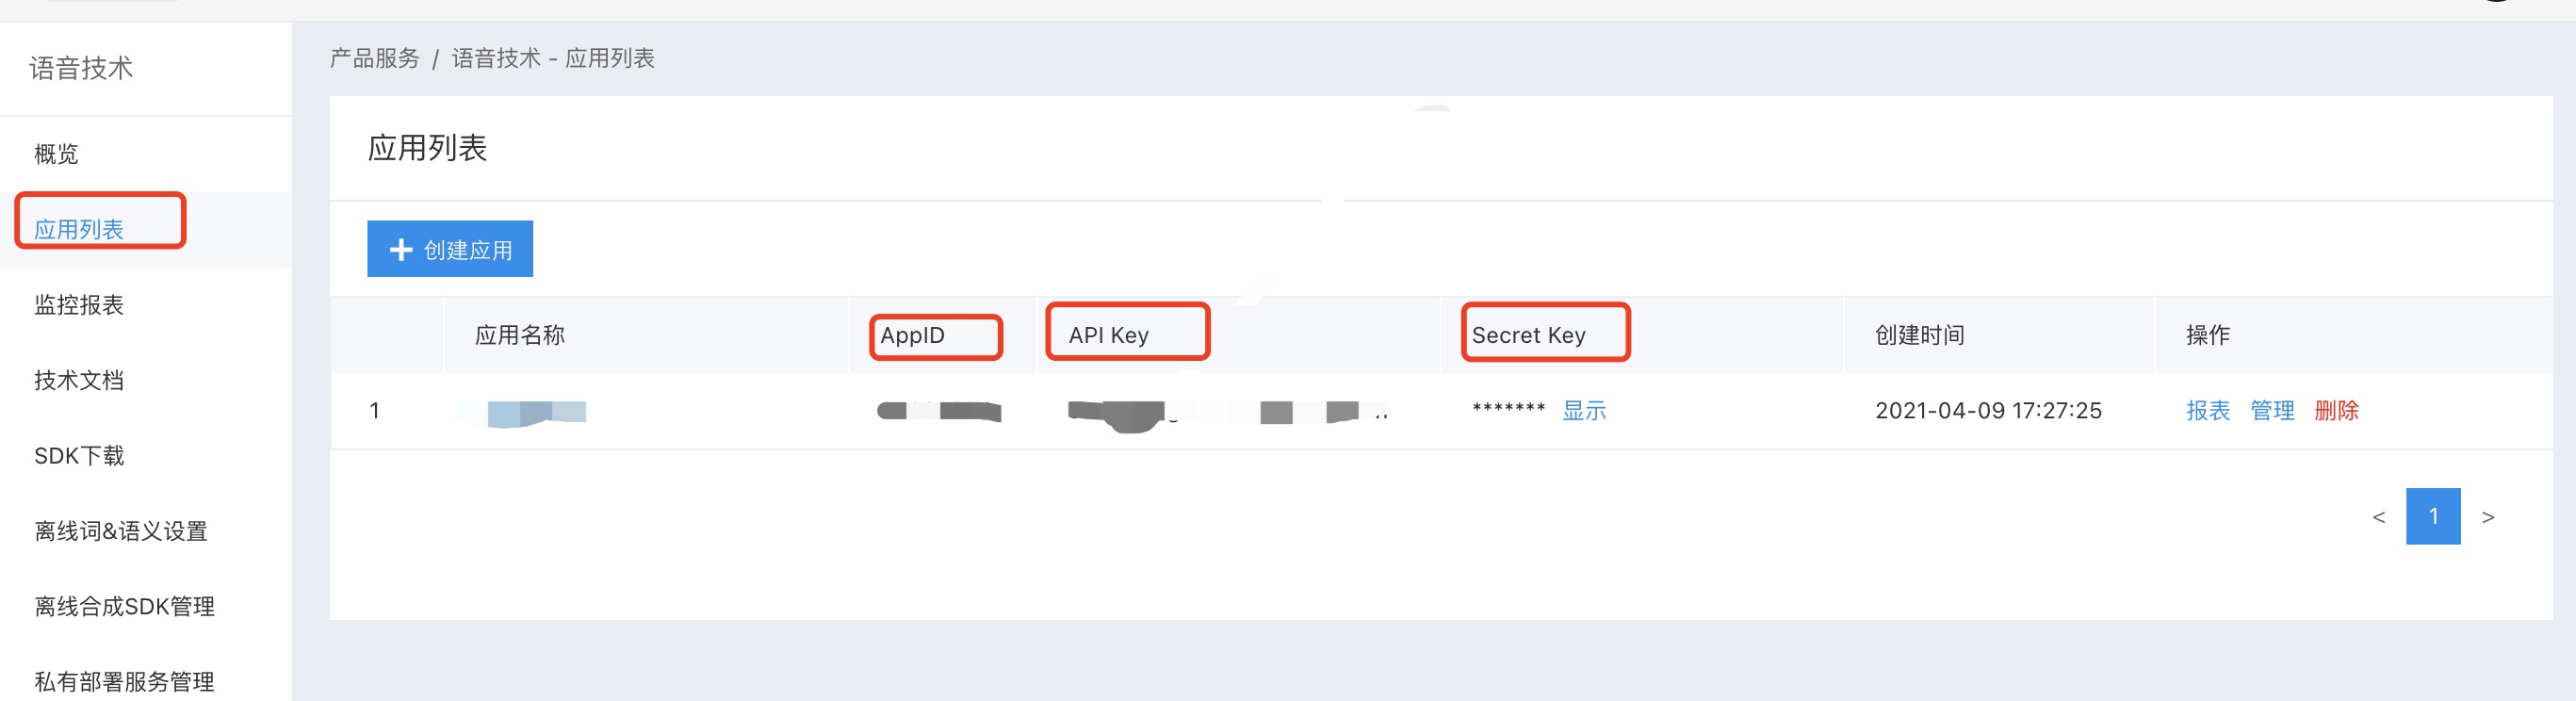
打开百度智能控制台 ,选中应用列表,创建新的要测试的应用,创建后会有,这里bundleId要写创建的对应的Notification Service Extension的bundleId,而不是主项目的bundleId,一定要注意!!!如下图
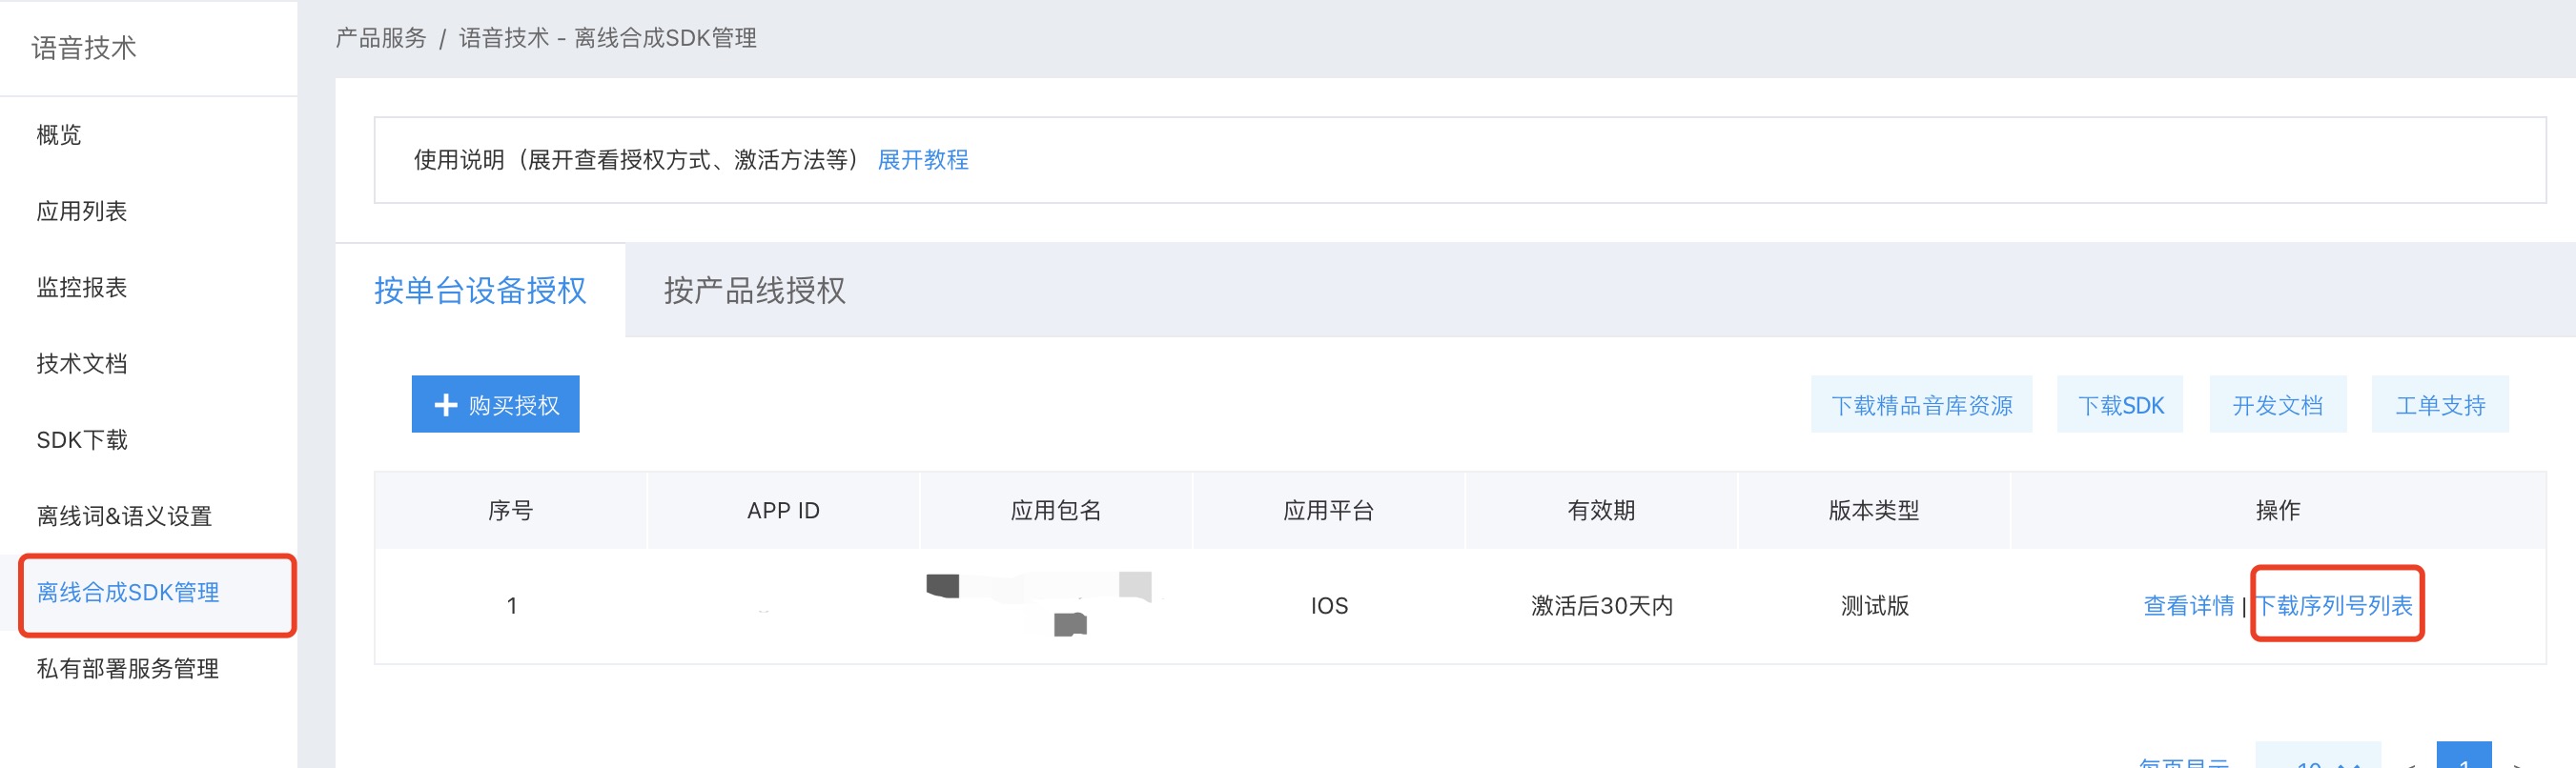
左侧选中离线SDK管理,点击添加,然后选中刚刚创建的应用,点击完成后,点击下载序列号列表,然后把AppId、AppKey、SecretKey、以及序列号存储,用于初始化离线SDK。如下图
左侧选中离线SDK管理时,点击右边的下载SDK,以及开发文档 ,按照SDK的说法
集成指南: 强烈建议用户首先运行SDK包中的Demo工程,Demo工程中详细说明了语音合成的使用方法,并提供了完整的示例。一般情况下,您只需参照demo工程即可完成所有的集成和配置工作。
所以,把SDK下载好了之后,打开BDSClientSample项目,然后把TTSViewController.mm文件中的APP_ID、API_KEY、SECRET_KEY和SN改为刚刚申请的,然后运行测试,看能否正常播放语音,播放成功说明申请的没有问题,就可以继续往项目中集成,要不然,集成到项目中发现不播放,会怀疑是SDK的问题。😂,以为集成后调试确实很容易让人怀疑人生。
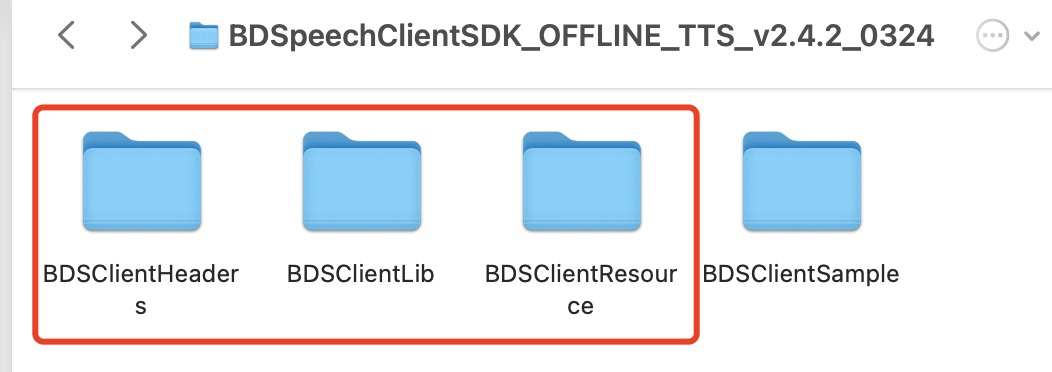
把SDK解压后的BDSClientHeaders、BDSClientLib、BDSClientResource文件夹拖拽到Notification Service Extension的target下,注意勾选copy选项,然后把BDSClientLib文件夹下的.gitignore删除,要不然编译会失败,真的,不骗人,😂,踩坑指南
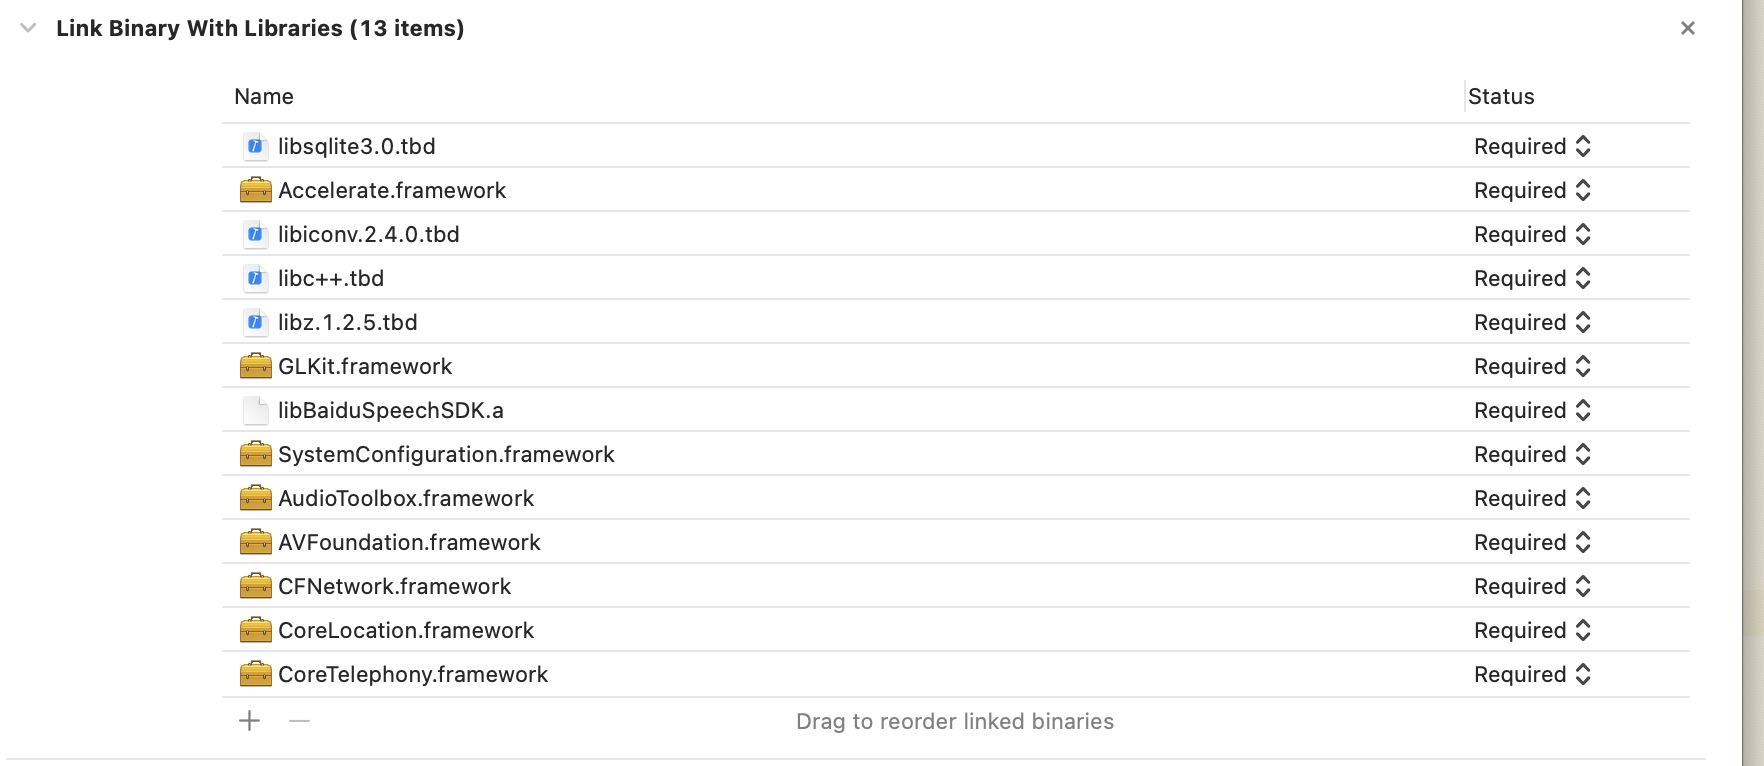
添加依赖的系统库,参考BDSClientSample项目中的依赖,注意添加到Notification Service Extension的target下,如下图:
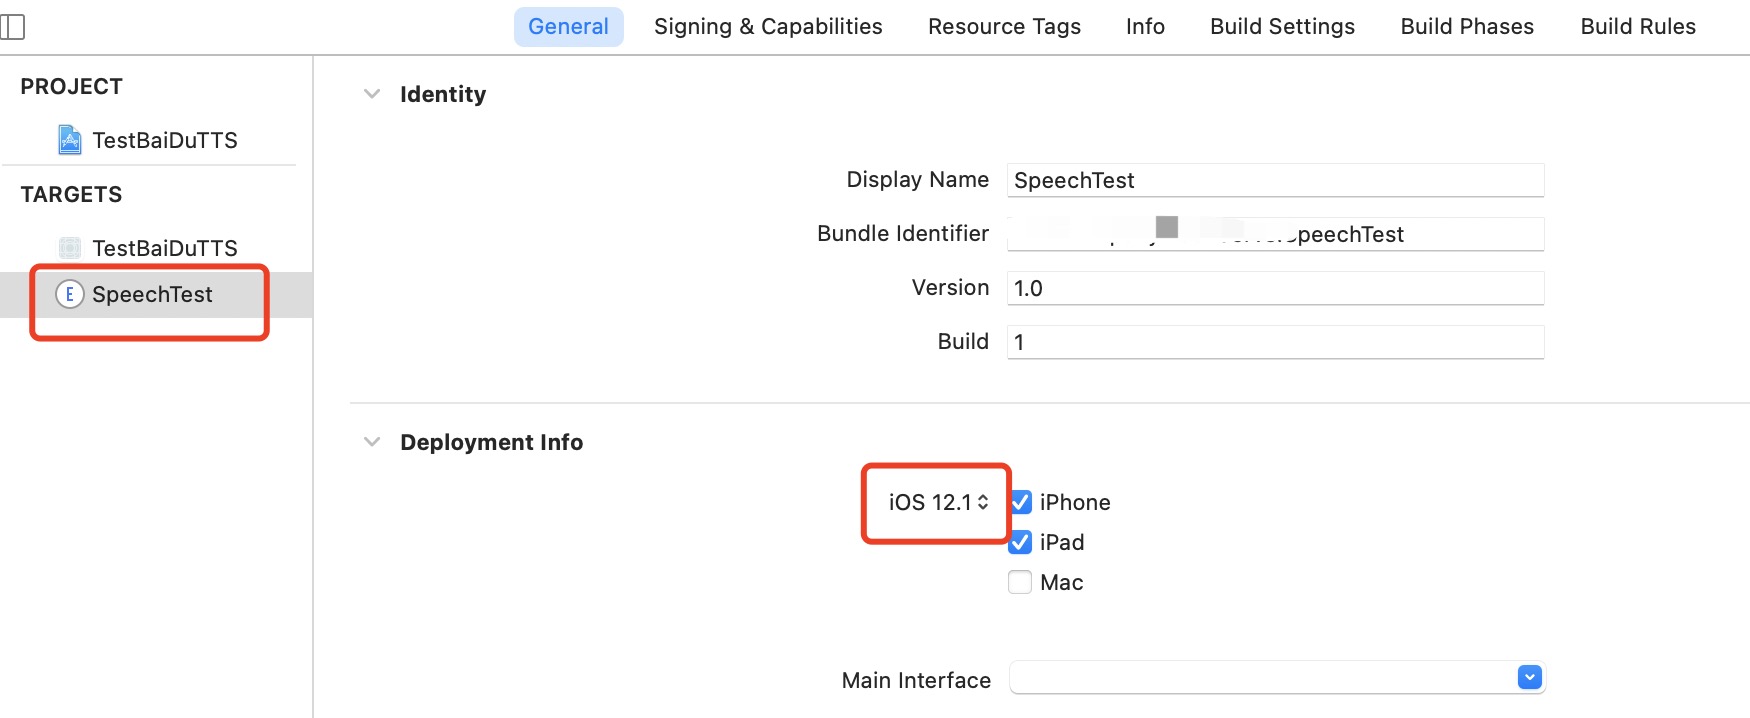
done,编译Notification Service Extension的target,注意选对target,噢噢,这个地方还有个问题,新创建的target是根据Xcode的版本来的,所以还需要修改一下这个target兼容的最低target,要不然默认可能是14.4,然后运行调试不报错,能正常运行,但是断点不走,惊不惊喜,😂。
添加百度语音处理代码到Notification Service Extension的target下,如上面写的,BaiDuTtsUtils代码如下
这里要注意的是, configureOfflineTTS方法中,offlineSpeechData和offlineTextData资源的加载,默认和Demo中写的一致即可,其实是BDSClientResource文件夹下TTS文件夹中的内容,如果下载的有别的语音文件,这里就加载自己下载的语音文件。
1
2
3
4
5
6
7
8
9
10
11
12
13
14
15
16
17
18
19
20
21
22
23
24
25
26
27
28
29
30
31
32
33
34
35
36
37
38
39
40
41
42
43
44
45
46
47
48
49
50
51
52
53
54
55
56
57
58
59
60
61
62
63
64
65
66
67
68
69
70
71
72
73
74
75
76
77
78
79
80
81
82
83
84
85
86
87
88
89
#import "BaiDuTtsUtils.h" #import "BDSSpeechSynthesizer.h" // 百度TTS NSString* BaiDuTTSAPP_ID = @"Your_APP_ID"; NSString* BaiDuTTSAPI_KEY = @"Your_APP_KEY"; NSString* BaiDuTTSSECRET_KEY = @"Your_SECRET_KEY"; NSString* BaiDuTTSSN = @"Your_SN"; @interface BaiDuTtsUtils ()<BDSSpeechSynthesizerDelegate> @end @implementation BaiDuTtsUtils + (instancetype)shared { static id instance = nil; static dispatch_once_t onceToken; dispatch_once(&onceToken, ^{ instance = [[self class] new]; }); return instance; } #pragma mark - baidu tts -(void)configureOfflineTTS{ NSError *err = nil; NSString* offlineSpeechData = [[NSBundle mainBundle] pathForResource:@"bd_etts_common_speech_m15_mand_eng_high_am-mgc_v3.6.0_20190117" ofType:@"dat"]; NSString* offlineTextData = [[NSBundle mainBundle] pathForResource:@"bd_etts_common_text_txt_all_mand_eng_middle_big_v3.4.2_20210319" ofType:@"dat"]; // #error "set offline engine license" if (offlineSpeechData == nil || offlineTextData == nil) { NSLog(@"离线合成 资源文件为空!"); return; } err = [[BDSSpeechSynthesizer sharedInstance] loadOfflineEngine:offlineTextData speechDataPath:offlineSpeechData licenseFilePath:nil withAppCode:BaiDuTTSAPP_ID withSn:BaiDuTTSSN]; if(err){ NSLog(@"Offline TTS init failed"); return; } } - (void)playBaiDuTTSVoiceWithContent:(NSString *)voiceText { NSLog(@"TTS version info: %@", [BDSSpeechSynthesizer version]); [BDSSpeechSynthesizer setLogLevel:BDS_PUBLIC_LOG_VERBOSE]; // 设置委托对象 [[BDSSpeechSynthesizer sharedInstance] setSynthesizerDelegate:self]; [self configureOfflineTTS]; [[BDSSpeechSynthesizer sharedInstance] setPlayerVolume:10]; [[BDSSpeechSynthesizer sharedInstance] setSynthParam:[NSNumber numberWithInteger:5] forKey:BDS_SYNTHESIZER_PARAM_SPEED]; // 开始合成并播放 NSError* speakError = nil; NSInteger sentenceID = [[BDSSpeechSynthesizer sharedInstance] speakSentence:voiceText withError:&speakError]; if (speakError) { NSLog(@"错误: %ld, %@", (long)speakError.code, speakError.localizedDescription); } } - (void)synthesizerStartWorkingSentence:(NSInteger)SynthesizeSentence { NSLog(@"Began synthesizing sentence %ld", (long)SynthesizeSentence); } - (void)synthesizerFinishWorkingSentence:(NSInteger)SynthesizeSentence { NSLog(@"Finished synthesizing sentence %ld", (long)SynthesizeSentence); } - (void)synthesizerSpeechStartSentence:(NSInteger)SpeakSentence { NSLog(@"Began playing sentence %ld", (long)SpeakSentence); } - (void)synthesizerSpeechEndSentence:(NSInteger)SpeakSentence { NSLog(@"Finished playing sentence %ld", (long)SpeakSentence); } @end
c. 调试 刺激的部分来了,上面都编译通过了没问题,使用推送调试,先运行一次主项目,然后选中Notification Service Extension Target运行,didReceiveNotificationRequest:withContentHandler:方法中添加断点,,给自己推送消息,会发现断点走到了这里,说明target的创建没有问题。
然后控制推送参数的,isRead和isBaiDu参数,决定推送过来的语音是否走百度的语音播放。噢,说到推送参数,这个地方还需要在payload推送参数中添加”mutable-content = 1”字段,eg:
1
2
3
4
5
6
7
8
9
10
11
12
{ "aps": { "alert": { "title":"标题", "subtitle: "副标题", "body": "内容" }, "badge": 1, "sound": "default", "mutable-content": "1", } }
推送调试,会发现运行正常,但是语音没有播放,不管是系统的还是百度的,哈哈哈,崩溃不。仔细看控制台,会发现,报错如下
Ps: iOS 12.0之后,在Notification Service Extension调用系统播放AVSpeechSynthesizer时报的错误。
1
2
[AXTTSCommon] Failure starting audio queue alp! [AXTTSCommon] _BeginSpeaking: couldn't begin playback
Ps: iOS 12.0之后,在Notification Service Extension调用百度的SDK直接播放时报的错误。
1
2
[ERROR][AudioBufPlayer.mm:1088]AudioQueue start errored error: 561015905 (!pla) [ERROR][AudioBufPlayer.mm:1099]Can't begin playback while in background!
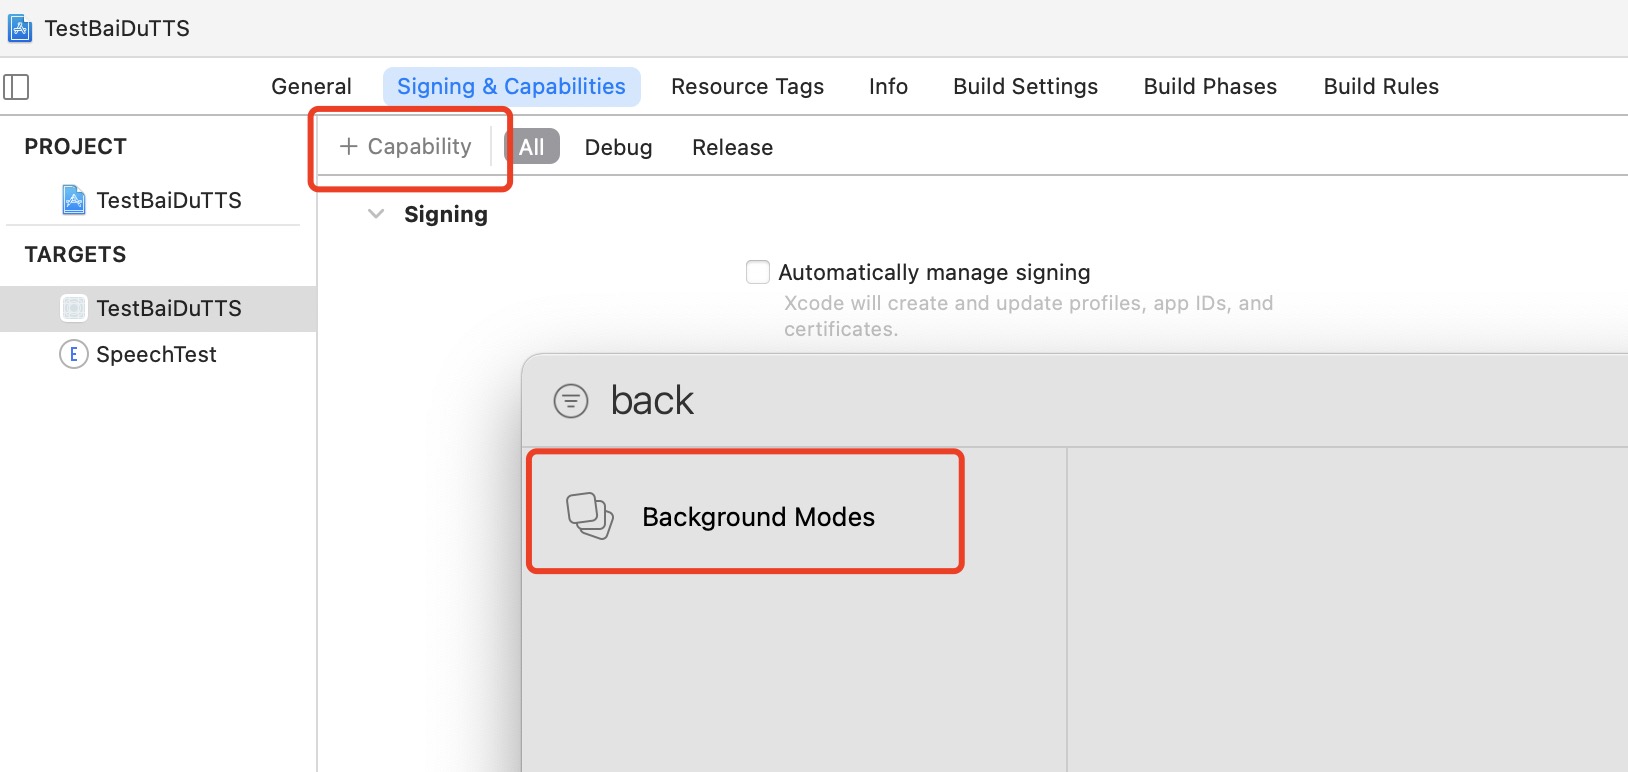
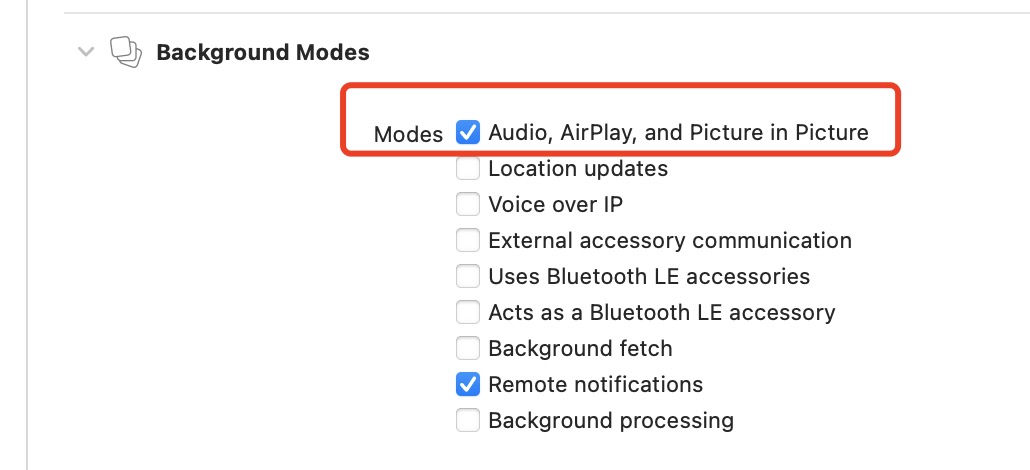
都是一个意思,即不能在后台播放音频。怎么解决呢,当然是添加backgroundMode字段了,打开主工程的Signing&Capabilities,添加backgrondModes,勾选Audio, Airplay, and Picture in Picture,如下图
OK,try again! 再次推送,会发现————还是不行,同样的报错,哈哈哈,绝望不,不好意思,我收敛一下,这个地方其实添加的没错,只不过要注意
在Notification Service Extension配置了之后,发现收到通知后还是不会播放声音,在这个Extension的Target下打开plist,添加Required background modes字段,里面item0写上App plays audio or streams audio/video using AirPlay后,再次调试,发现百度的语音即可播放。
这种方式审核时不被通过,因为这个Extension的target其实是没有backgroundMode的设置的,从Signing&Capabilities中可以看出,直接添加backgroundMode是没有的。故而如果不是上线到苹果商店的,只是公司内部分发,可以用这种方式。
添加了之后,再次推送,就会发现百度的语音就可以播放了,而且数字和英文、中文播放都十分完美,除了价格有些感人,其他的没毛病。
由于项目不需要上线商店,所以到这里其实就结束了。但是对于上线到商店到应用来说,这种处理方法是不行的,上线到商店的应用其实只有播放固定格式的音频一种解决方法,即替换推送的声音。使用固定格式的音频、或者固定格式的合成音频替换掉推送的声音,或者采用远程推送静音,发送多个本地通知,各个本地通知的声音替换掉这种方法。这些是从末尾的参考中得到的启示。
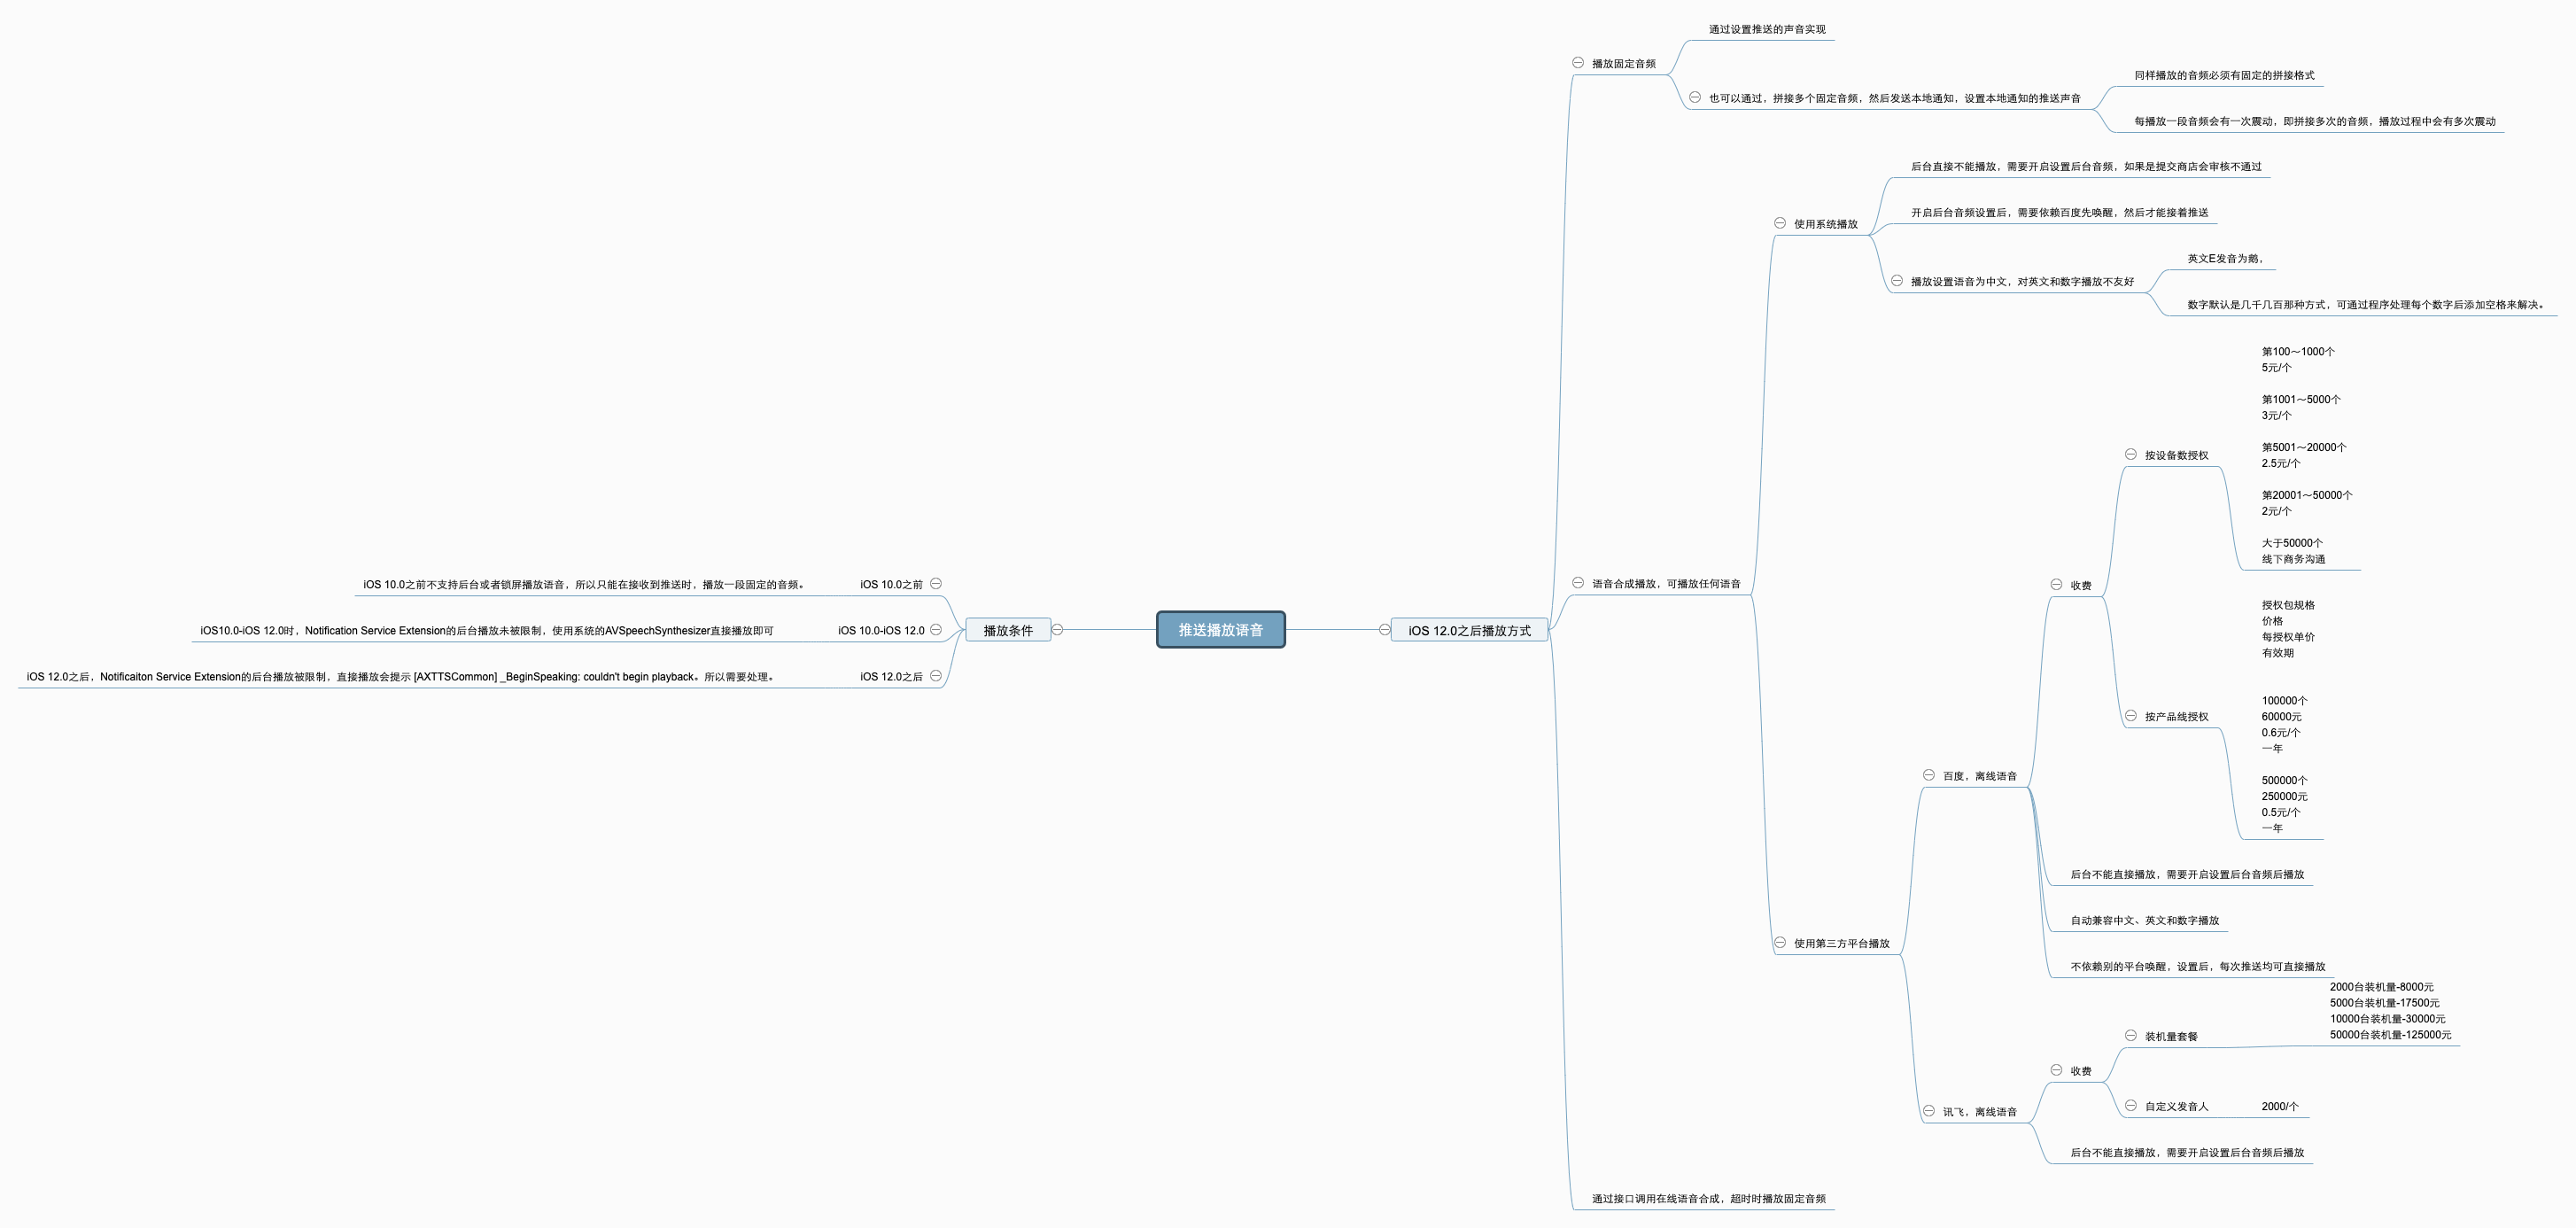
三、结论 直接上图,整理后的思维导图如下,大部分比较复杂的处理逻辑其实是iOS 12.0之后的处理。
参考